While using a cloud server, It always very difficult to set up a domain or sub-domain in the digital ocean or AWS & activate SSL. In given few steps I will explain to you how easily you can set up a sub-domain and activate free SSL.
Setup Sub – Domain in Digital Ocean
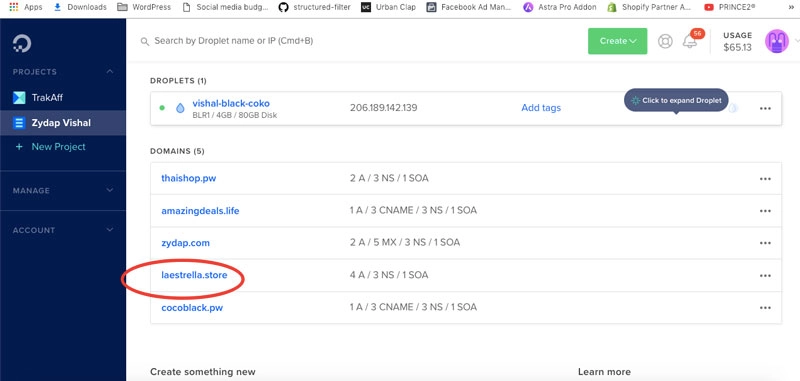
- Login to Digital Ocean
- Click on the domain – e.g I want to make nexgi.laestrella.store – so I m click on laestrella.store
As marked in red.
![]()
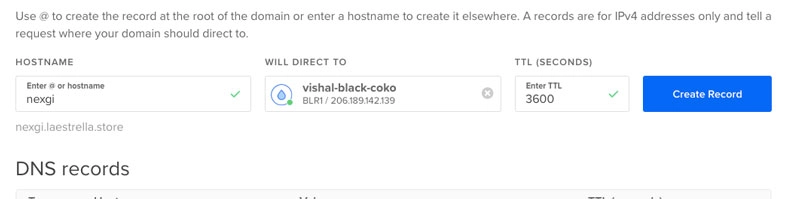
- Then Add two records as given screenshot
First nexgi second www.nexgi (only write bold text) and point to your droplet. (see below)
![]()
![]()
- Now your subdomain is pointing to your droplet but – if you will hit/open it. It will open the default or main domain. So now you have to tell which folder will be pointed when someone hit this sub-domain using a virtual host.
- Access your terminal/or GUI method & create a folder where you want to point this subdomain like I created nexgi.laestrella.store under /var/www/
like I created /var/www/nexgi.laestrella.store
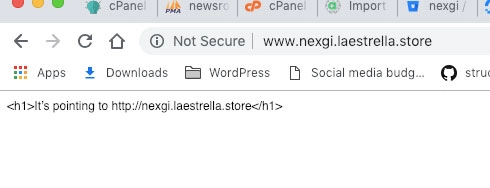
- Make a Sample file in this domain with the name of index.html with below code – It will help to confirm your sub-domain is pointing right directory.
<h1>It’s pointing to https://nexgi.laestrella.store</h1>
- Now you have to make a config file in apache at below location
/etc/apache2/sites-available/nexgi.laestrella.store.conf Please note: this location may differ as per your installation path. Paste the following codes & change the bold text as per your domain & pointing directory name.<VirtualHost *:80> ServerAdmin webmaster@nexgi.laestrella.store ServerName nexgi.laestrella.store ServerAlias www.nexgi.laestrella.store DocumentRoot /var/www/nexgi.laestrella.store ErrorLog ${APACHE_LOG_DIR}/error.log CustomLog ${APACHE_LOG_DIR}/access.log combined </VirtualHost> - Now, this site is available but not enabled or activated to work.
To enable it – you need to press a small command from terminal & change the bold sub-domain as per yours.sudo a2ensite nexgi.laestrella.store
Then reload your server configuration – by hitting
service apache2 reload - Now you have enabled successfully – Just you need to reload your server configuration. Navigate your sub – domain – like in my case –
With WWW https://www.nexgi.laestrella.store/
![]()
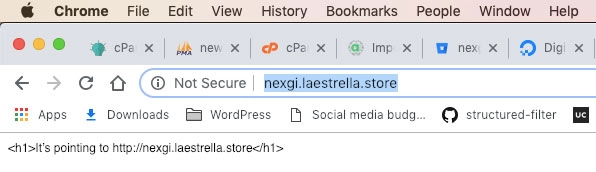
Don’t forget to test without WWW
like in my case https://nexgi.laestrella.store/
![]()