WordPress is a powerful and flexible platform that allows users to customize their websites as per their unique needs. In WordPress, one of the popular customizations is creating a custom sidebar, that provides additional functionality and design options for your website. In this step guide, we’ll learn how we can achieve the custom sidebar in WordPress.
So Let’s assume we have a sidebar design as shown in the below image.

In the above-shown image, we have Menus and Additional Content we can get the Menus dynamically but what about the Additional Details that’s why we are going to register a Custom Sidebar for it.
But before we dive into the Custom Sidebar creation you need to understand the hooks & actions that you can read from here –
https://www.nexgi.com/category/wordpress-development-tutorials/,
And if you are interested in learning more about the hooks & actions in depth you can checkout the link – https://developer.wordpress.org/plugins/hooks/actions/
So Let’s do this in a quick few phases –
Phase 1: Register and Assign location in the Theme
To create a custom sidebar, you’ll need to access your WordPress theme files and then navigate to “functions.php”. In “functions.php” you need to create a function and inside this function, we are going to use WordPress’s register_sidebar() with Param as shown in the below image.
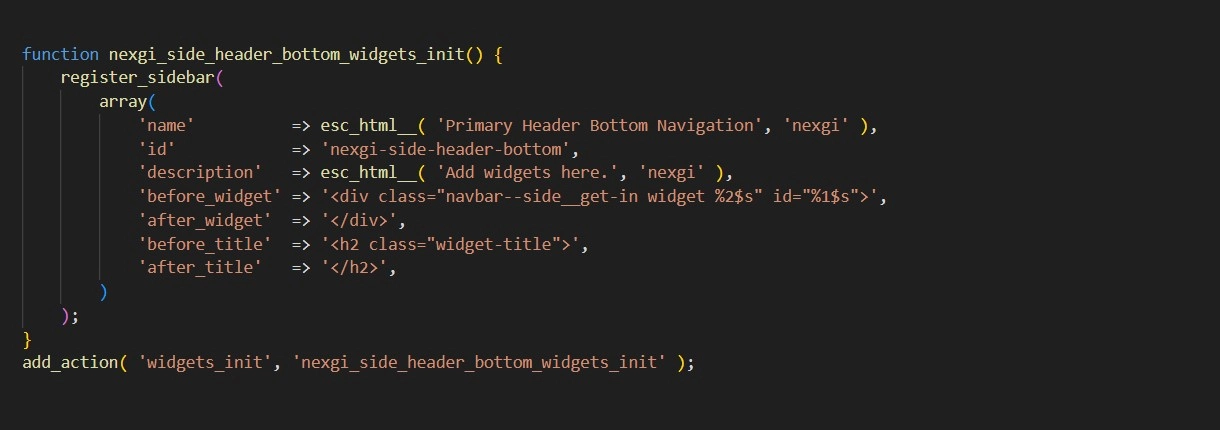
In the above-shown image, we have declared a function named “nexgi_side_header_bottom_widgets_init” & inside this, we used “register_sidebar()” with the params like – name, id, description, etc. Here you need to understand the use cases of these params for example –
- name – Displays the widget name
- before_widget – Allows you to create a Parent wrapper with custom classes and id
- after_widget – Allows to close the Parent wrapper.
You can learn in-depth about the params & register_sidebar through – https://developer.wordpress.org/reference/functions/register_sidebar/
Now we registered the sidebar successfully but before moving to the next step we have to cross-verify whether the sidebar is showing or not in the Admin Panel for that we need to go to the –
Admin Panel -> Appearance -> Themes -> Customize(Selected Theme) -> Widgets.
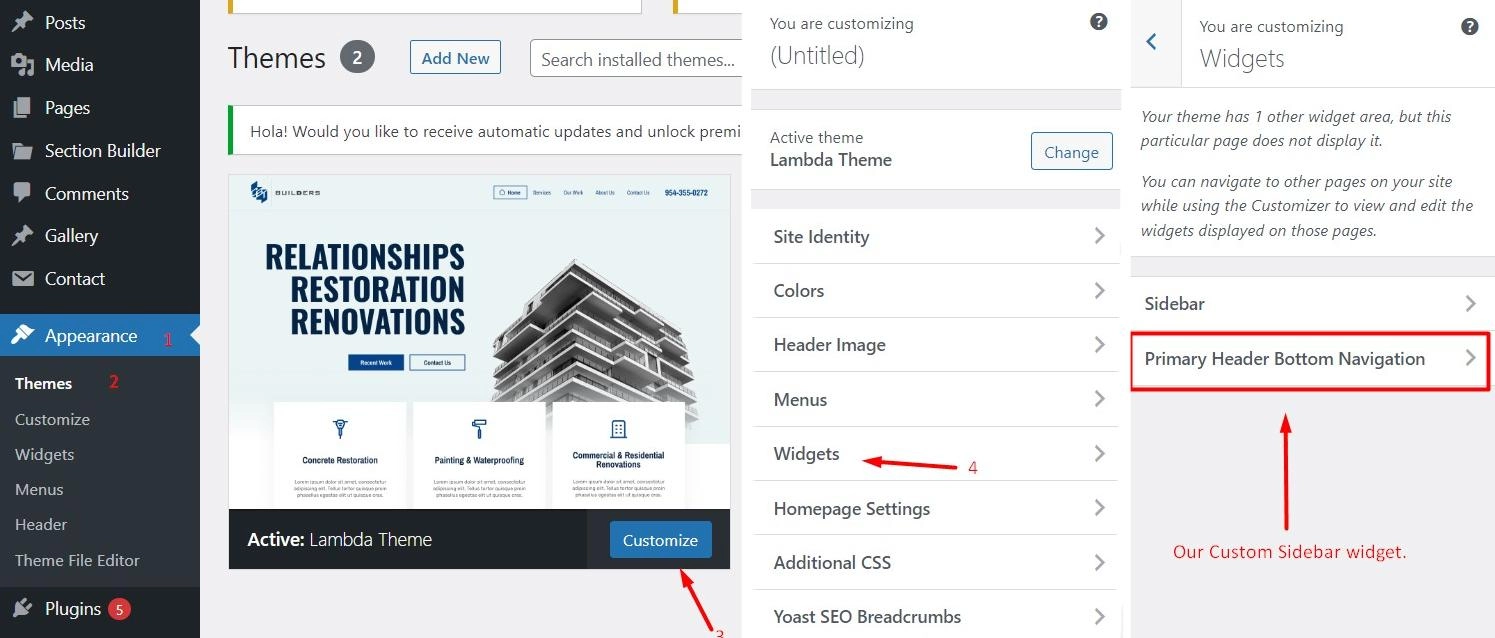
As you can see our Sidebar has been successfully registered now we are going to assign the location. To assign the location to the sidebar we have to navigate to the file in which we want to show the sidebar for example we are going to show that sidebar in the header, So we go to the “header.php” in our theme and then add a function like shown in the below image.
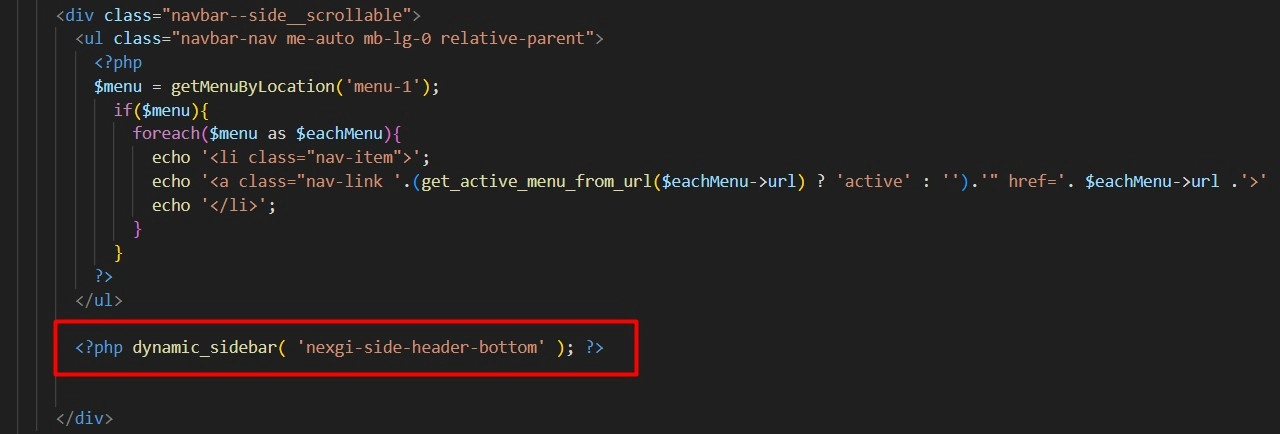
To show the sidebar we used “dynamic_sidebar()” and inside the function, we passed the “ID” of our sidebar which we have declared in the above image. before going to use “dynamic_sidebar()” make sure you have included your header.php or any other preferred file to the “functions.php” or where you have declared the “register_sidebar()” with the action.
Phase 2: Content Update
Now we have registered our sidebar and assigned the location, So let’s have a look at how to add or update the content for that we have to go to the widgets and then inside our custom sidebar widget named “Primary Header Bottom Navigation” we can add multiple things like – paragraph, heading, list, codes, image and etc.
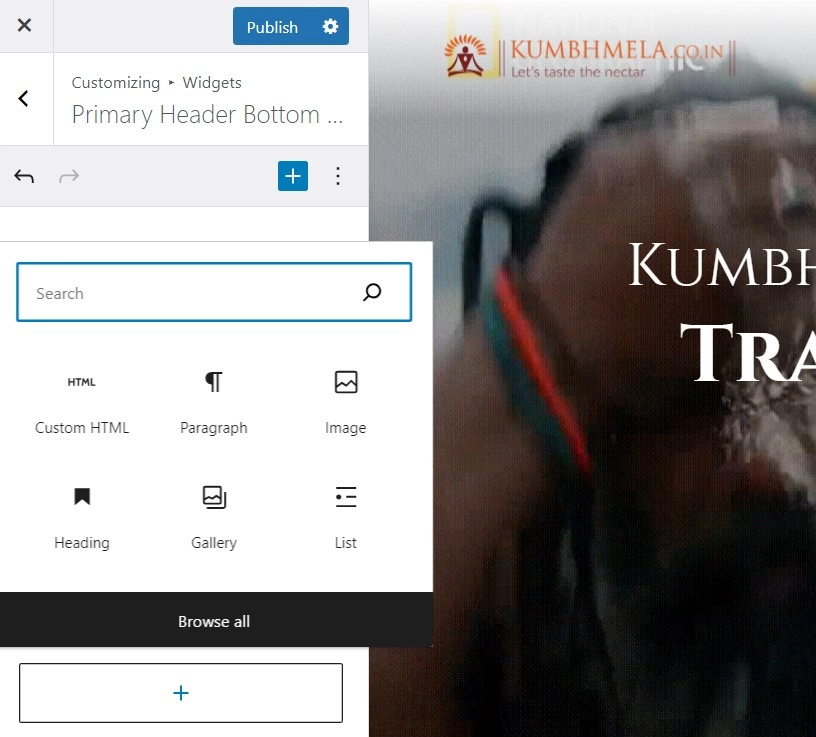
We are going to use a code block to add “anchor” tags with their respective content and values.
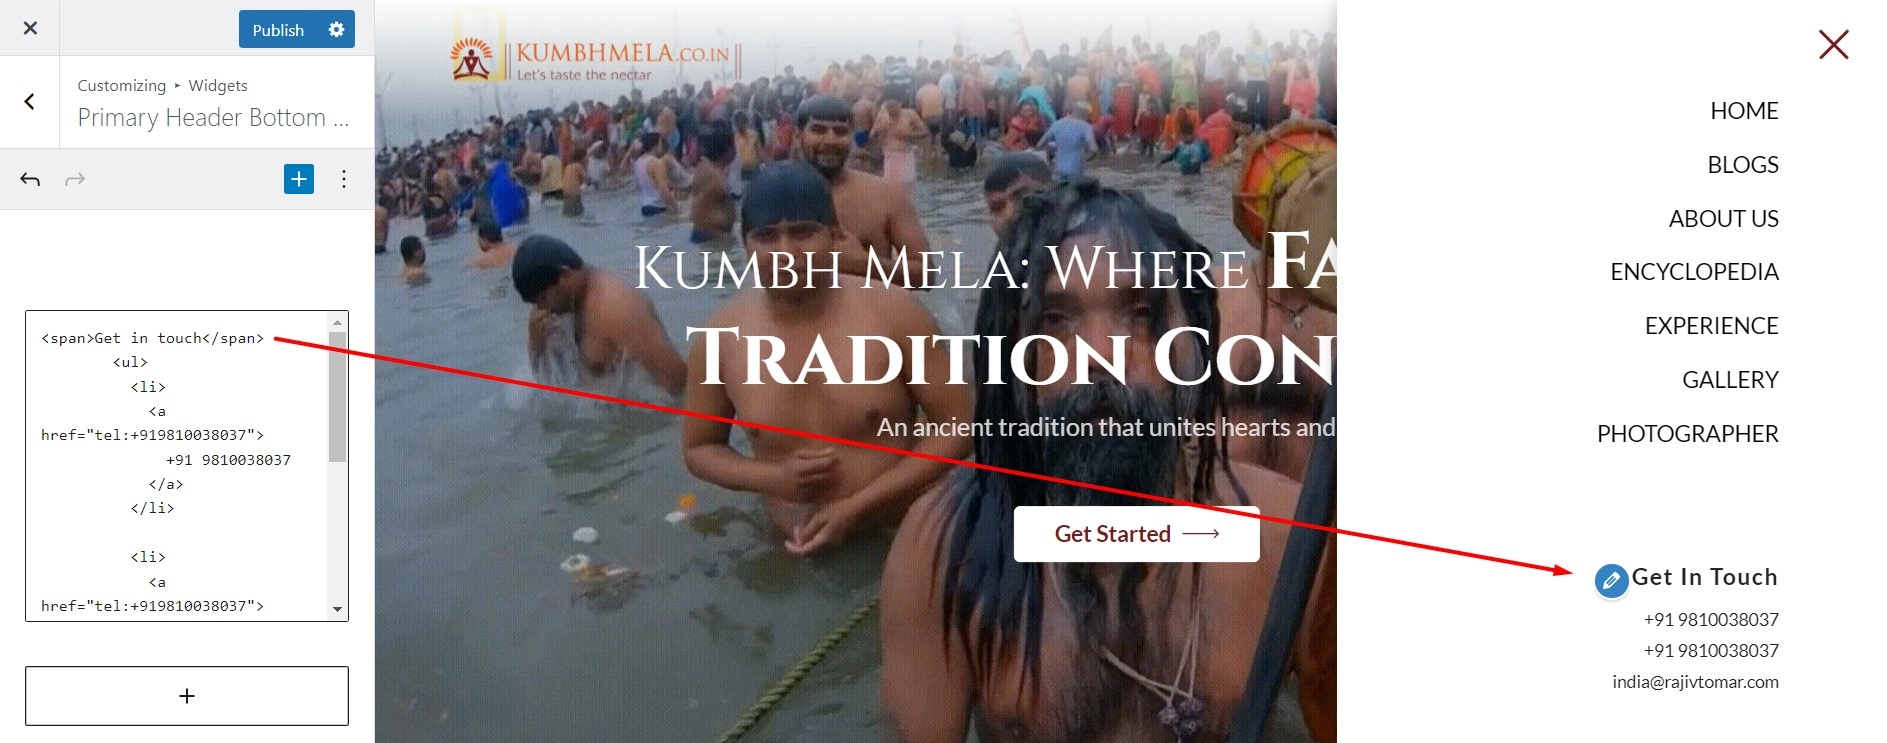
As you can see we have added some HTML elements and our content is showing in the desired place now to make some formatting or design changes we can use the custom classes that we have provided to the “before_widgets” key in the “register_sidebar” function.
That’s all, there you have your custom sidebar.