If you are a developer and working for any client or want to update existing WordPress theme details and folders and looking for how to rename a theme in WordPress, then you are at the right place.
Here we will explain to you how to rename the theme folder, and how to update theme details that appear in Appearance -> Themes.
You will see your theme name like this (yoursitename.com/frontend_skin/themes/yourthemename).
If you don’t want to show your theme details to the public, then simply change your WordPress theme name.
It feels very embarrassing when your client or any other person noticed that you have used a WordPress theme. In this article, we will tell you simple steps to remove the theme name in WordPress.
How to update theme name in WordPress/rename theme in WordPress.
STEP 1 – Log into your WordPress admin panel.
STEP 2 – Navigate to Appearance – > Themes and deactivate your current theme. You can also activate another theme.

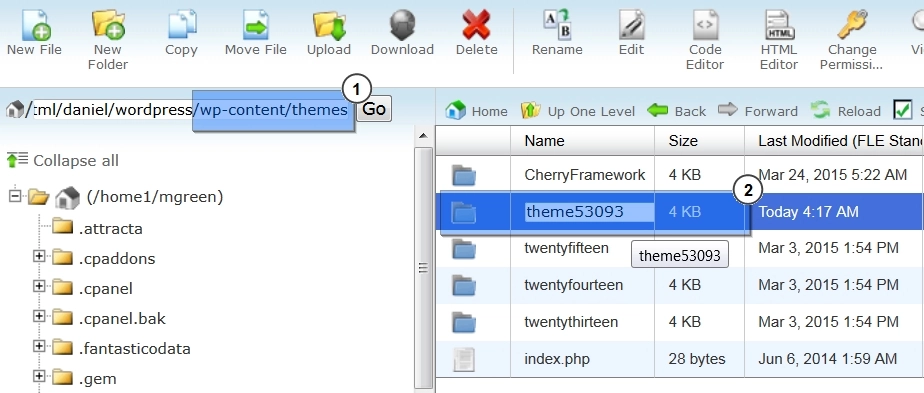
STEP 3 – Access your Server using any FTP server File Manager or cPanel provided by your host.
STEP 4 -Navigate to ‘siteRootFolder/frontend_skin/themes/’ directory on the Server

STEP 5 – Rename the theme folder.

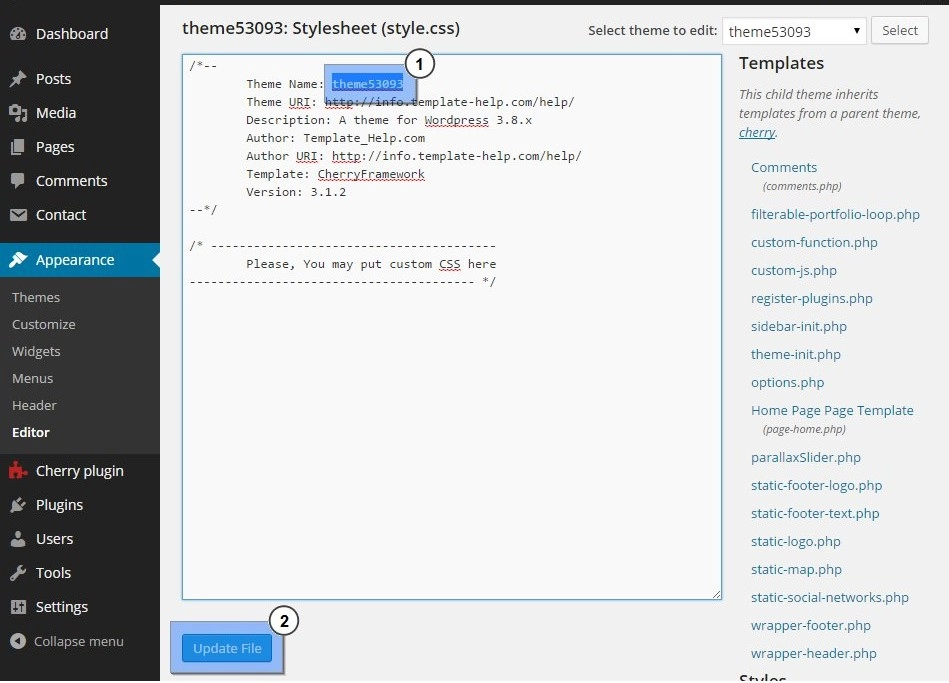
STEP 6– Get back to your WordPress Dashboard and navigate to the Appearance -> Editor menu.
STEP 7– Select your theme to edit and click ‘Select’ Current theme.

STEP 8-Open ‘style.css’ file – You will get similar codes in the above screenshot (they are mostly at the top)
STEP 9 – Change the‘ Theme Name’ value to your new theme name.
Save the changes:
Change all values on the right side – e.g for the theme name we have given highlighted colors.

STEP 10 – Get back to Appearance – > Themes menu and activate your theme
(Current theme on which you have updated just now).
I hope these 10 simple steps to rename the theme name in WordPress helped you to remove the traces.
In case you are facing issues, we have an expert team for WordPress, feel free to contact us.


