How to compress or resize photos online?
This article will answer the following questions of fellow humans:
Resize an image without stretching it?
Compress an image online?
Reduce the File of an image online?
How to use online Photoshop?
How to compress passport-size photos online?
I wrote a post, “How to compress or resize a passport size photo,” and it’s still trending on the first page of Google search results. That post was about resizing images in Microsoft paint. In this article, I will show you how to do it online using the free editing tool Photopea.
Who can use a standard example of a passport-size photo for anything like website banners, signature photos, product photos, or your dog’s photo that you want to print or upload online?
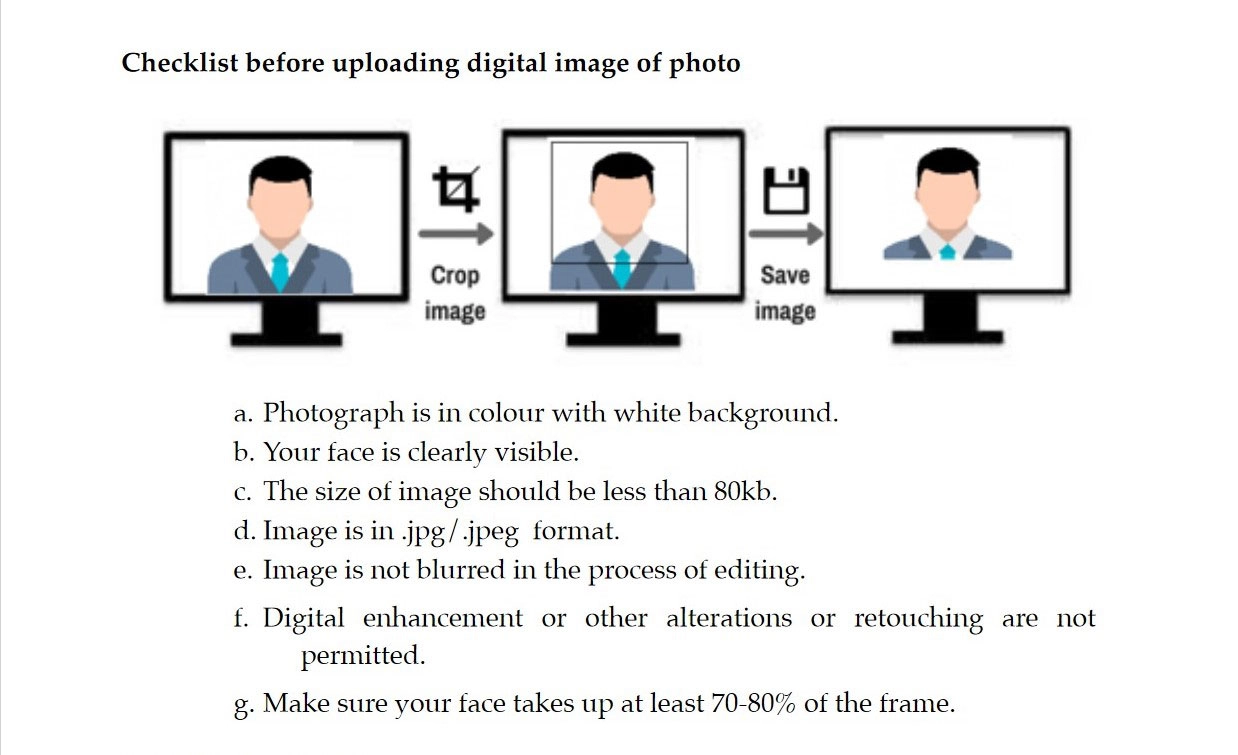
- Read the guidelines for your image specification.
In most cases, you are asked to upload a passport-size photo having a dimension of 35x45mm and less than 80kb in size. It can be any size according to your use case.
2. Open Photopea online editor in your web browser.
3. Upload your image to the editor
By clicking on File > Open. You can also drag and drop the image that you want to edit in the Photopea browser window.

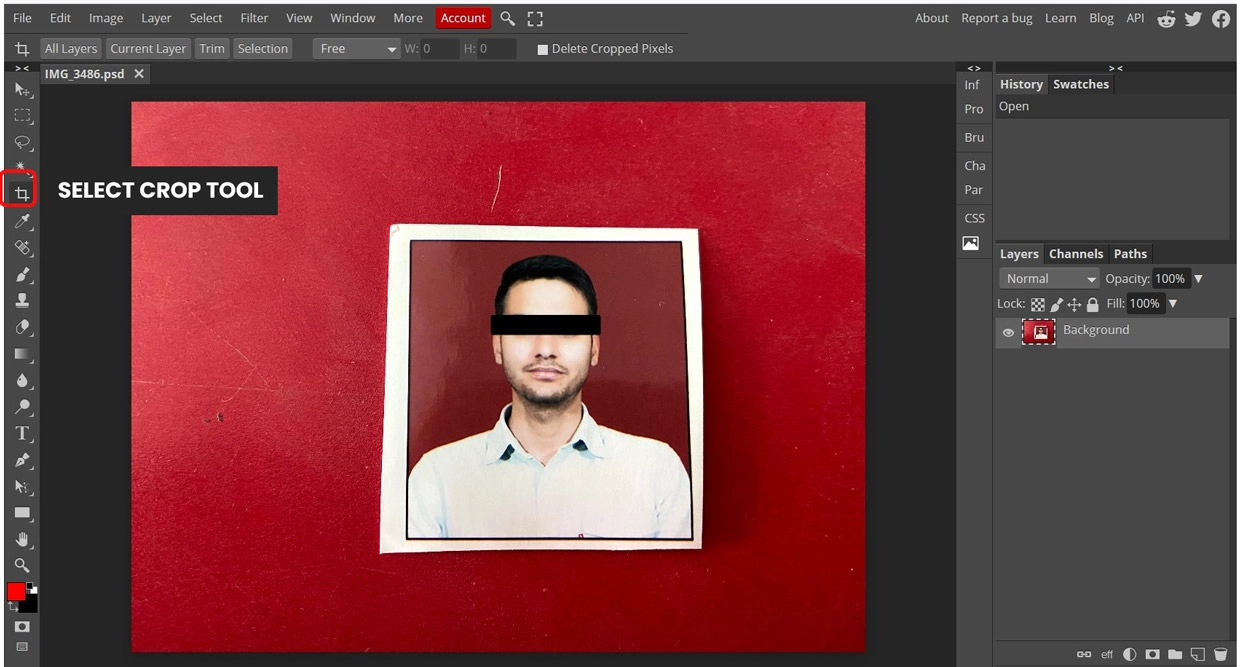
4. Click on the Crop tool from the toolbar.
You can also select it by pressing the C key on your keyboard. I’m considering you are clicking the photo using your smartphone or scanned by a scanner.
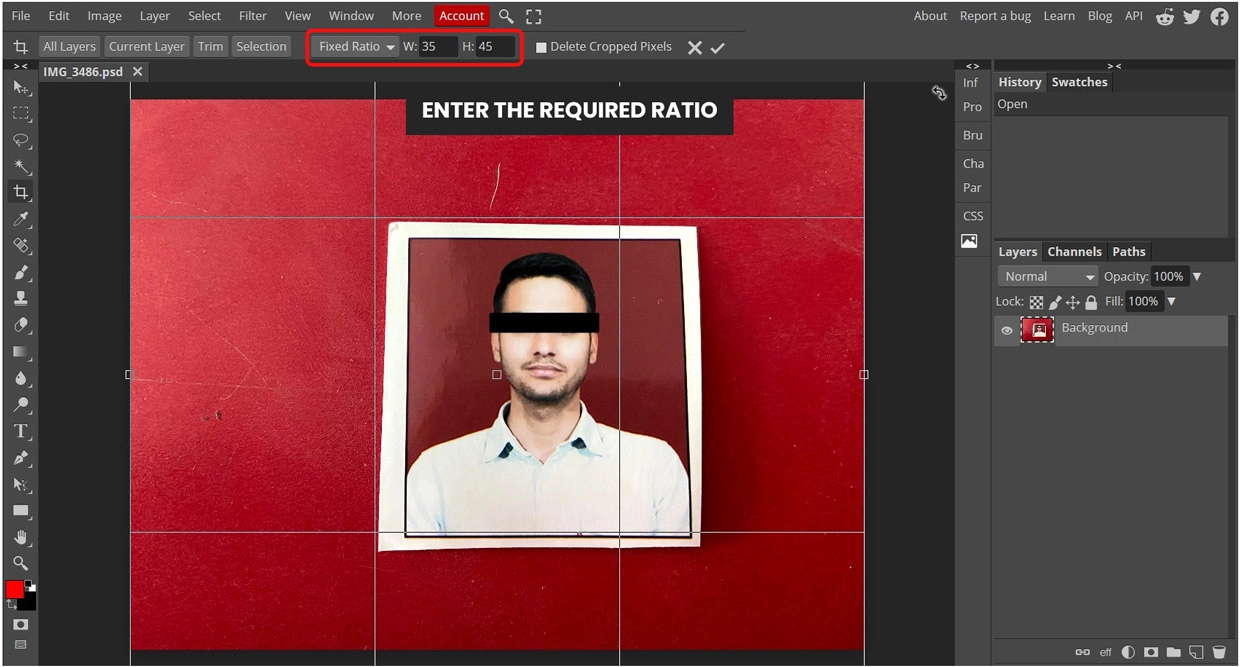
5. Select the Fixed Ratio option from the dropdown menu.
Enter the required aspect ratio in the crop tool. For this example, we have 35×45 mm, for a website banner it could be 800×800 px. Just input the numbers, don’t worry about the units, it’s going to be the same for all.
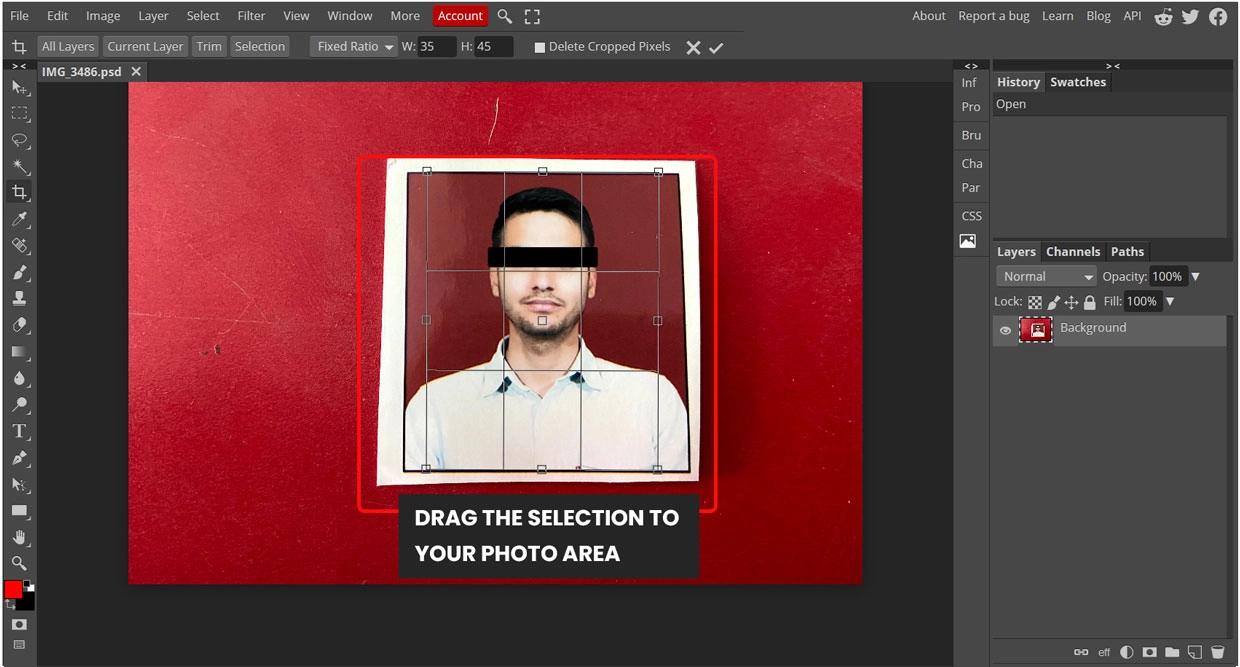
6. Now drag the crop boundaries to your image area and press Enter key.
Because we have set the dimensions for the required image, the crop tool will make a selection area in that proportion only.
7. Now your image is ready with the required ratio.
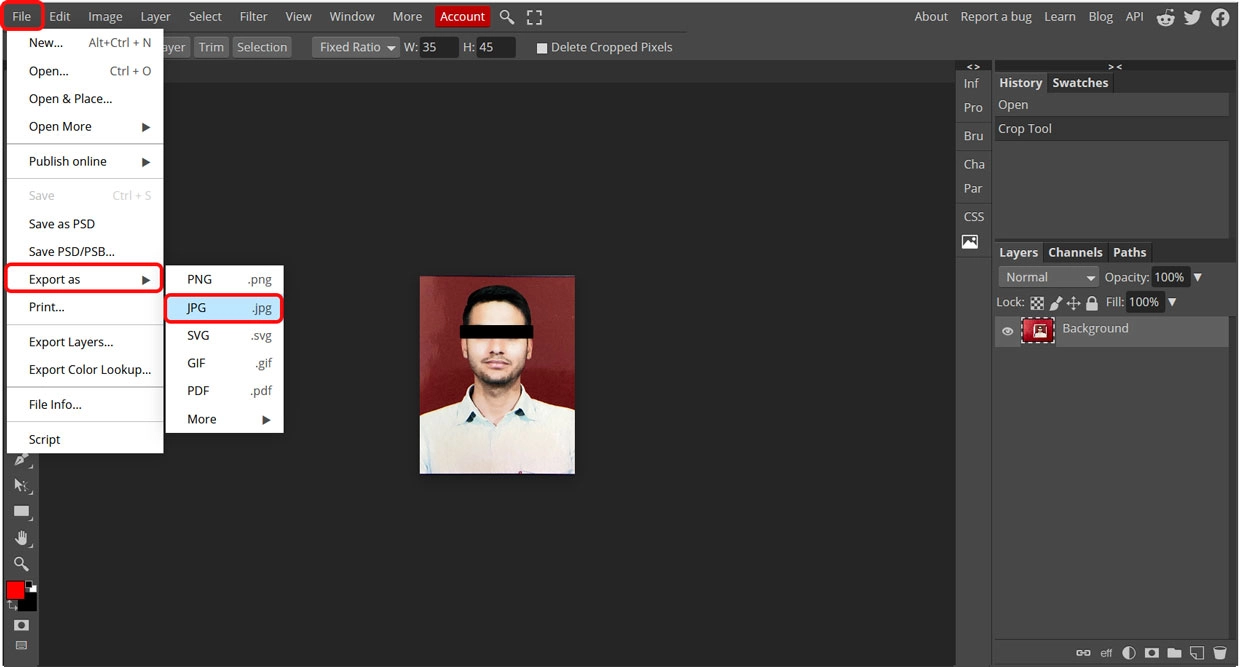
But, we need to save it in the required dimension and file size. Click on File menu > Select Export as > Choose JPG or PNG whatever is required.
8. Just a few more clicks and your photo is ready.
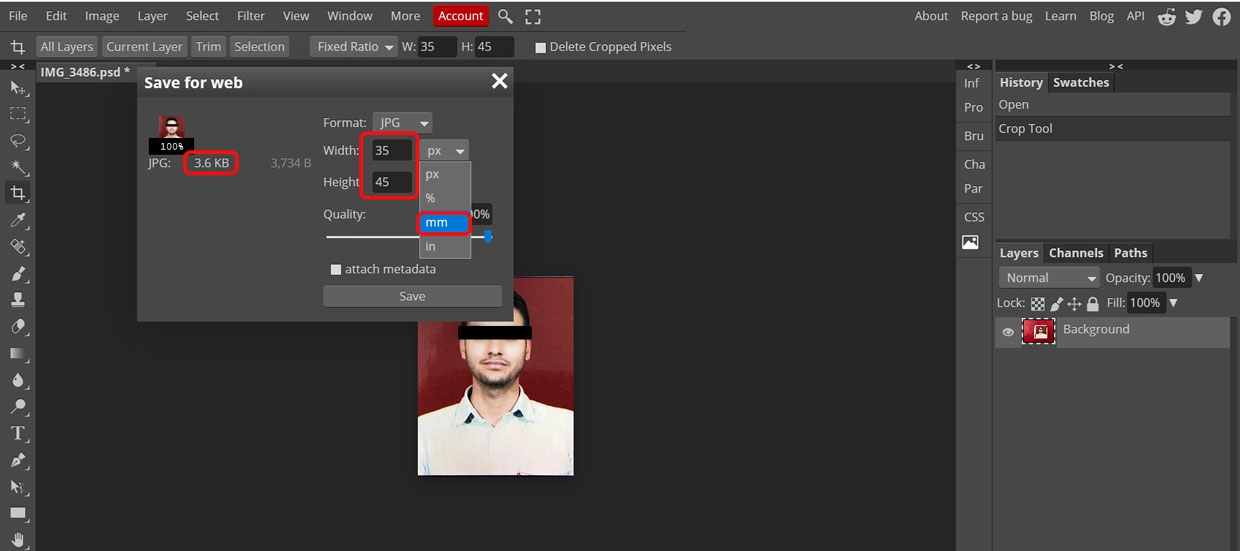
After clicking on the JPG option, a popup will appear. Now input the required width and height, also change the unit to mm as by default it’s set to px. On the left side, you’ll see the file size, you can increase or decrease the file size by changing the quality percentage given in the slider.
9. Done, now save the photo and share the article with the needful people.
Hope it helped you resize the passport size photo. You can apply these steps to any image with any dimensions. You just need to know the required dimensions.
Cheers!