Today I’m going to explain the basic 4 steps you to teach online for free using zoom. After completing these 4 steps you will be able to take a first online class.
Before the start, I would like to explain to you about Zoom!
What is Zoom?
Zoom is an online conferencing cloud-based service. And I’m going to explain to you about the free plan where you can reach up to 100 students with max 40 minutes of session at a time.
So Let’s start!
Let’s see 4 the steps, Those we are going to follow to teach online for free using zoom:
Step 1. Create an account on zoom
Step 2. Generate an online classroom link
Step 3. Invite your students?
Step 4. Join & Control the class to teach online for free
Step 1. Create an account on zoom
To use this conferencing software you need to create an online account on their website to teach online.
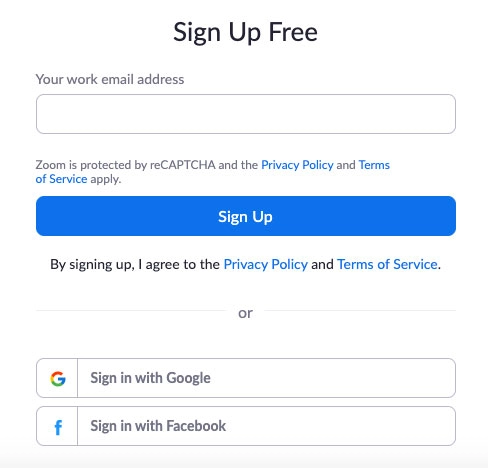
- Click on this link – https://zoom.us/signup
![]()
- You will get three option to signup
- Through email (Email Verification required – more time consuming)
- Via Gmail (No email verification required – recommended option)
- Through Facebook (No email verification required – recommended option)
- Once you are done with signup process – Just log in
Step 2. Generate an online classroom link
- Go to https://zoom.us/signin (You can skip you are logged in)
- Enter your email ID and password or do social login (You can skip you are logged in)
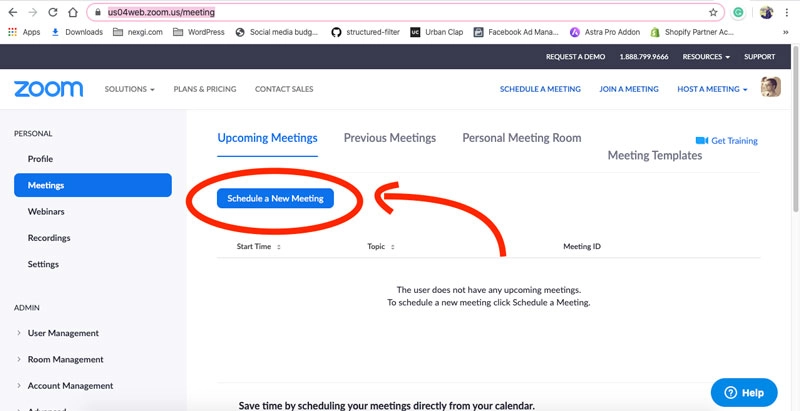
- Go to meetings – https://us04web.zoom.us/meeting and click on schedule a new meeting to generate an online classroom link.
![]()
- You will be asked for the following data:
- Topic – The name of the meeting. It will be visible to your user. You can enter your topic name that you are going to teach.
- Meeting Description (Optional) – You can leave it blank or Enter points that will be explained or some important points.
- When – Date & Time – you can add when you are going to take the class.
- Duration – keep untouched as you are using a free plan.
- Timezone will be GMT+5:30 India or whatever timezone you follow (If outside of India)
- Recurring meeting – Check if the class is going to be regular at the same time. So same meeting ID or invite URL will work for a lifetime.
- Meeting Password – Setup meeting password – So if someone else gets the meeting URL then wouldn’t be able to join.
- Video – Who can on their video –
- Keep Host (you) on
- and for the participant (off) because the student shouldn’t use their video otherwise if everyone will share the video – class will not work properly.
- Audio – Keep both on for video – because it maybe you need to play some video
- Meeting Options –
- Enable join before host – If you disable this option first you need to join otherwise no one can join. so keep unchecked this option. Because sometimes you may be late.
- Mute participants upon entry – keep it checked – If you enable this means when someone will join the call it will be auto muted. Which is good. Otherwise, it will be so noisy at the starting of the class.
- Enable waiting room (must be checked)– If you enable this – the student can wait and join.
- Record the meeting automatically on the local computer – If you enable this – every student will get recorded lecture when the class will be stopped.
- After this click on Save
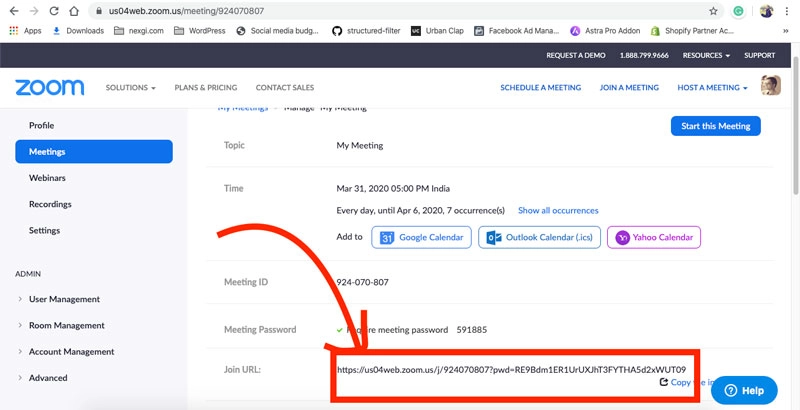
- That’s it! copy your classroom link from here
![]()
Step 3. Invite your students?
Now you have invite link but don’t know how easily you can broadcast. So you have three easy options:
- SMS them (but costly)
- Broadcast through Whatsapp (Free & Easy)
- Telegram Channel (Free & Easy and you can track how many students has seen it). But using the channel you can also share notes and other details continuously without sharing your details.
Step 4. Join & Control to teach online for free
This is a very important factor – if you shared your link in between students. Suppose 30 students joined the online classroom then what tools zoom. What tools you get to help you.
How online classroom looks like:
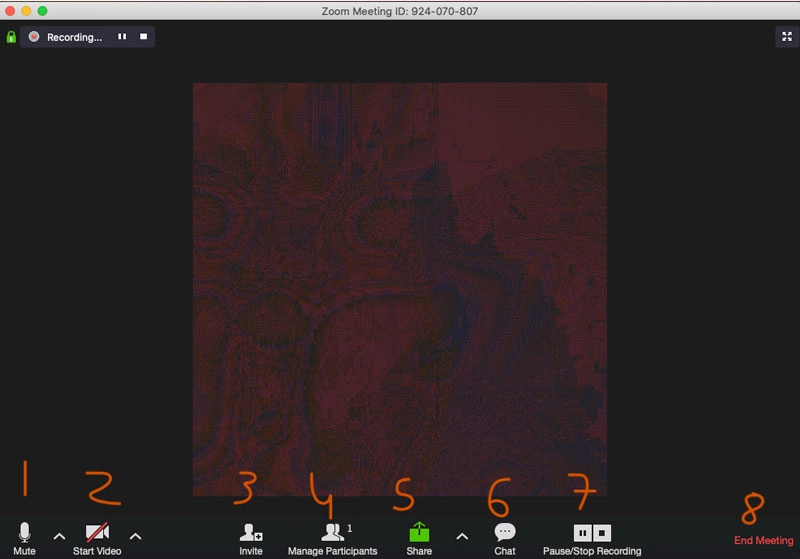 So Here are the controls:
- Mute – You can mute yourself – means your audio will not go to your students. It needs because sometimes urgent discussion your need to do but you don’t want to share with your students.
- Video – Same as mute (but mute is for audio) and it’s for video.
- Invite – you can copy the link from here – like while running call you can invite someone else.
- Manage Participants – You can see how many people have joined – you can fire (if you are the host) or mute them
- Share – you an share your screen using that.
- Chat – That’s chat room – anyone can ask through text.
- Pause/Stop Recording – If you enabled recording then it will come here.
Hope you got everything to start – just go on zoom and start your first online class.
Benefits to teaching online for free
- You don’t need to invest because you are new and don’t know how to use technology. So you can practice.
- No Geographics restrictions – Offline you can teach in a particular radius – but online you can teach anyone. from other state or another country.
- It Make you future-ready – Online classes are the feature of Education. You must upgrade yourself to do the same.
- Save your travelling cost – You don’t need to travel daily to teach students. you can do it from your home.
If you need to transform your education system you can contact us – https://www.nexgi.com/contact-us/. We help institutions and schools or individuals to transform their education system and sync with current technology.